


Whiskers are not the same as the dog’s hair because they are more innervated (or connected to nerves). They allow the dog to experience its environment in a focused way, and they not only receive signals but also transmit them, for instance pointing forward if the dog feels threatened.
I have known dogs to have very short whiskers, so that they don’t look like they have any, while others have many very long ones, not only around the muzzle but also above the eyes and on the chin. For single-colour dogs like Labradors, it is worth counting the whiskers on both sides of the muzzle, because there is often an imbalance in number and placement, which adds interest to the painting. There are often colour differences, ranging from light to dark black whiskers.
It is very hard to make a brushstroke depicting the fineness and length of a whisker. My solution is to print them instead by painting the edge of a piece of card and then applying the paint to the point where the whisker emerges from the face. This is not always accurate, so you need to have a wet cloth available to wipe off the paint which goes beyond that point. However, when correctly done, this technique is incredibly effective.
TOP TIPS FOR PAINTING WHISKERS
-
The face needs to be finished, dry and accepted by the owner before you apply whiskers. Any later change will make any whisker work redundant.
-
If the background paint is thick and uneven, painting or printing a fine line will be impossible, which is why I tend to paint smooth backgrounds.
-
The volume of water to paint in the mix applied to the card edge must be right. Too wet and the paint will blob and diffuse on the painting surface; too dry and the line will be uneven, with gaps. Try out the consistency on spare paper, then if it works, recharge the card with paint and apply to the painting.
-
If the card isn’t fine enough, try different thicknesses such as a postcard or magazine cover. I have offcuts from my 300gsm (140lb) prints which create an excellent finish to a whisker. The beauty of using card is that you can bend or angle it but you always get the same thickness of line.
-
The card faces you when you apply paint to it, but you will turn it to print on the painting, so remember that the left of the card becomes the right side of the painting. If you want the whisker to be finer to the right, apply the paint to the card with a brush, moving from right to left so it runs out towards the left. When you turn the card over to print, the whisker will be finer on the right.
-
Sometimes the paint doesn’t thin out sufficiently due to the paint/water mix. Let the painted whisker dry partially, then gently wipe a wet cloth along the line, thinning the paint and lengthening the whisker.
-
When you have found the correct thickness of card, you can also paint a light reflection within the thickness of the whisker – the advanced technique!

To make the whiskers appear three-dimensional, use two tones of colour: one for the dominant whiskers and another for the smaller and less important ones.
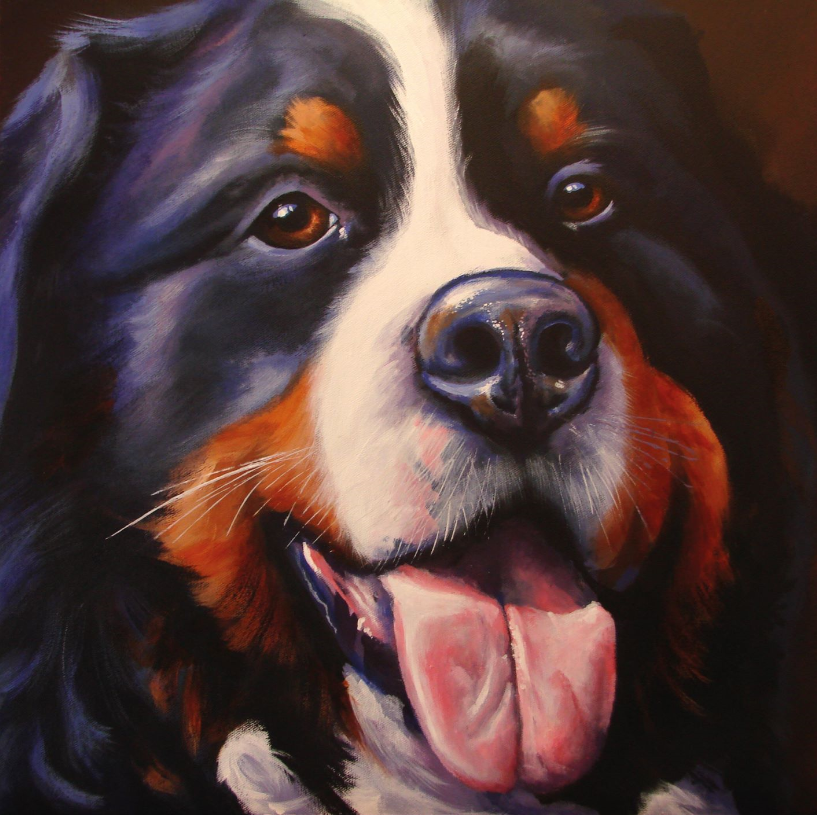
Toby, Bernese Mountain Dog, acrylic, (50.8 x 50.8cm (20 x 20in)
Comments
Login or register to add a comment