




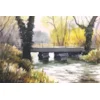
Mike Rollins demonstrates the uses of three painting knives – and produces a painting full of texture and interest


When I’m painting landscapes or cityscapes, however complex, I aim for a relaxed style to convey atmosphere and movement. If it’s a particularly detailed composition there can be a tendency, if using brushes, to become too tight and controlled. In such a case, I’d probably reach out for a painting knife, which forces me to use rough shapes, accidental marks and construction lines.
I have a bagful of old painting (and palette) knives in my studio that are losing handles, bent or encrusted with paint and, although I keep telling myself that they will all come in handy someday, I still reach out for just one or two favourites. It is worthwhile getting to know a few knives well, experimenting with the shapes that they make and learning how they can enhance your style of painting. Which brings me to the three Panart painting knives that I am reviewing in this month’s issue. I’m happy to say that they will not be thrown into the knife bag for the foreseeable future!
Quality and characteristics
Although the basic silhouette remains familiar, the construction of the Panart knives shows that they have aimed for a premium product market. The handles are smooth and flattened, with rounded edges, which feel comfortable and secure in the hand. The use of a ‘densified wood’ mix gives the handles an attractive and unique orange- brown tiger-stripe patterning, which is slightly iridescent when catching the light. A round collar encompasses the flat, quarter-inch neck, which becomes the shaped tool head. The blade is made from a ‘special grade’ steel with a satin finish and varies in thickness, depending on the shape. Overall, the knives feel light and grip well in the hand and, after taking a few knocks, seem nice and robust.
I have been given three knives to try out – the Diamond (3½in. long), the Arch (2¼in. long) and the small Leaf (1¼in. long). I used Daler-Rowney System 3 acrylic paint on an acrylic paper surface to test the knives.
The Diamond


- The larger knife can be seen as the blocking-in tool, but that depends on the scale of the painting. Its long blade is ideal to load with a good quantity of paint, to sweep across a surface broadly and cover it quickly. In my example (Figure 1), I added a green and a yellow to my palette and picked up both colours on the knife, for a colourful sweep. (Scraping these two around further in different directions allowed blending, of sorts (Figure 2), on the surface.)
- Being a long and relatively stiff blade, the Diamond is also good for printing lines (Figure 3). Flattening the paint on the palette and cutting a bead along the edge of the knife, I pushed the knife firmly against the surface.
- The swish of colour can be taken further by scratching marks into it with the tip, or side, of the blade (Figure 4). The Diamond can make a variety of marks but is less controllable than the smaller knives.
The Arch


- This knife is almost rectangular in profile, with a broad rounded end. The kink in the neck is steeper than the Diamond, which allows it to be held flatter against the painting surface. Therefore, it is excellent at covering the paper in an even coat of paint (Figure 5).
- It is also a much thinner blade, which makes it very flexible and allows for a very light touch. This is handy for multiple coverages of colour, as in my demonstration, where I lightly floated titanium white over cerulean blue for a cloudy effect (Figure 6).
- Detailing with the Arch is less successful because of its broad shape, but I did make roundels and lines, which could be shaped further by bending the blade (Figure 7). Again, a larger canvas would offer more scope to play with possibilities.
The Leaf


I have to say that the Leaf was my favourite of the three for its versatility. The handle is the same size as the other knives so your hand has much more control over the small, tapered blade.
- Control is key, such as when creating square shapes. Scraping a bead of dark brown (ultramarine and burnt umber mix) onto my knife, I worked from the edge of the shape and dragged the paint inwards, working my way around the square (Figure 8).
- Gently scraping over the paper offers lovely broken lines, which can then be scratched into – in this case, suggesting mortar joints in brickwork (Figure 9). The blade head is only slightly flexible so you can draw and shape quite easily with it.
- Being a smaller blade, printed lines and arches are reduced in size, but good for details, such as windows (Figure 10).
- Finally, if you are a fan of thick impasto elements, the Leaf is excellent at delicately placing teardrops of paint onto a surface, if you want small flower heads or leaf shapes (Figure 11).
Overall, I’m very impressed by the build, quality and general handling of the Panart painting knife range. They feel like a quality knife, and you’ll want to look after them to preserve the beauty of those lustrous handles!
Demonstration

York Walls in Spring
Mark making is unique to every individual so I’m sure fellow artists will find myriad other marks and uses for these painting knives. However, to illustrate how I would use each of them, I painted the following picture using acrylics.
You will need
Surface
Canvas on 6mm ply board, 9x12in (23x30.5cm)
Panart painting knives
Daler-Rowney System 3 acrylics

Step 1
The canvas board had been primed with a couple of coats of white gesso. With a HB pencil, I loosely drew in the outlines of the wall, grassy bank and tree, moving them around a little to work within the composition.

Step 2
On a flat, tear-away palette, I added a large blob of cerulean blue. With the large Diamond knife, I spread the paint out a little, before scooping up a large amount onto the blade. Transferring this to the sky area, and working from the top of the wall inward, I flatly glided the knife over the surface. I worked around the sky, building up a layer of paint which I smoothed and encouraged into the corners and around objects. Now and again, I might lose a bit of wall or tree, but the paint can be scraped away, wiped with a cloth or overpainted later.


Step 3
1 I cleaned my knife and added an amount of cadmium yellow and Emerald green to my palette. The colours were loosely mixed, before being scooped onto the knife and scraped gently onto the grassy banks. The colours were allowed to mix on the canvas, and I made sure that the final marks followed the direction of the slope.
2 Where the paint was still thick and wet, I pressed firmly with the flat of the blade then sharply pulled away, giving a puckered, raised effect, suggesting grass and leaves.


Step 4
1 For the basecoat of the wall, I mixed a dark, using Ultramarine and burnt umber. Switching to the smaller Leaf knife, I lifted an amount of paint onto the blade and blocked in the wall – gently pulling away from edges towards the middle of the form. Very little pressure is needed for any blade when applying paint. After using horizontal movements of the blade edge to suggest a path, I switched knife again.
2 Grabbing the broader Arch knife, I loaded up the blade surface with the dark mix and flatly dragged it down the shape of the tree trunk. The more flexible blade allowed for a gentle glide down to the middle, and again when I reloaded to drag paint from the bottom of the tree upwards.


Step 5
Wiping off the blade, I continued with the Arch knife. After adding some Titanium white to the palette, I spread it out a little before cutting a roll of paint onto my knife. I returned to the sky and ever so gently, and flatly, glided the knife over the surface. As the paint interacted with the blue beneath, the surface tension pulled on the white and broke it into irregular shapes, resembling clouds. This is quite accidental and an effect you must give yourself up to! Your job is to coerce the paint in a general direction. I added a touch of the dark mix to the white and repeated some areas of cloud to give a shadow side.


Step 6
1 Returning to the wall, I mixed more of the cloud grey colour as before to resemble limestone. Using the Leaf knife, I picked up a roll of paint on the edge, and carefully scraped it onto the wall, leaving shadow areas. I allowed the surface tension to pull paint off the blade as I went to give a random texture to the surface.
2 Using the tip of the Leaf knife, I scratched into the wall, drawing lines of stonework and structure, revealing the dark colour beneath.


Step 7
From here on in, I mostly used the small Leaf blade for details. To Emerald green, I added a little white and then lifted this mix onto the edge of my knife. With v-shaped printed marks I filled the grassy bank with ‘daffodil leaves’, making sure that the ones closest to the foreground were thicker, impasto paint.

Step 8
To add variety of tone, I added some of my dark mix to the Emerald. Again, with the Leaf knife, I printed and pressed areas of darker green into shadow forms – on ridges, from the base of the tree and within the daffodils.


Step 9
Whilst the shadows were drying, I cleaned my knife and picked up some of the light grey. I printed and dragged lines of highlight down the left-hand side of the tree trunk.

Step 10
1 As the background was nearly complete, I could then work on the tree and branches. Replenishing my dark mix of Ultramarine and burnt umber, I flattened it out on the palette, picking up a small amount on my knife.
2 Carefully at first, with the edge of the knife, I printed branch shapes around the tree. Once the basic structure was there, I made faster, random marks to build up the canopy. If a branch was too thick, I scratched through it to thin it out.


Step 11
Now that the grassy bank was nearly dry, I could work on the daffodil flowers. I replenished my cadmium yellow and added a small amount of white to make it opaque. After cleaning my knife, I used the very tip to pick up some yellow and gently dab it onto the canvas. I printed larger dabs of paint in the foreground, and gradually decreased the size as the bank swept off to the left to give a sense of distance, making sure my marks were randomly spaced.

Step 12
My final actions were to assess what was needed to finish the painting whilst remaining loose and impressionistic! I decided to scrape a little beige (burnt umber and white) onto the wall in places to add interest and differentiate it from the cloud colours. With this same mix, I added highlights to the path, to draw the eye into the painting.


Mike Rollins
Mike is an artist, tutor and demonstrator based in Hertfordshire. Links to Mike’s website and social media can be found at www.linktr.ee/rollinsart
Takeaway
The basic format of any painting knife is the same and differs from a palette knife in one key feature. A palette knife has a flat profile from handle to blade, whereas the painting knife has a kink in its ‘neck’. This is to allow room for the painter’s knuckle if the blade is used flat on a surface.