The fire surround, candle holder and Santa stocking all emerge from dark into light, a theme I kept track of throughout the painting, grading concentrations of washes, losing edges either in the moment or afterwards by damping and lifting out subdued highlights, which hint at form and surface material among the darks. I studied the photo for a while before starting to paint, questioning what I saw. Is this object in front of or behind that one? Is it warm or cool, lost or found, flat or round, above or below, shiny or dull, hollow or solid? These questions are simple enough, but the answers, once diagnosed using the maxim – how do I know what I know? – are clear instructions on which colours, brushes, water content, timing and technique to use. Thinking in this way brings you to a better understanding of what you are looking at: clusters of reality with characteristics and relationships with each other, rather than a collection of abstract shapes without meaning. The knowledge will improve your rendering.

Your reference photograph for the painting, The Mantelpiece. Before you look at what I made of this, spend time examining the photograph, spotting the symptoms of what you see – warmth, reflection, light, shadow, mystery and sparkle – and consider how you might represent these characteristics if you were to paint them.
Step 1 - Portraying bright light

Portraying bright light emanating from a source involves either masking its white heart or cutting around it with washes if they are simple shapes, as here. Once the surrounding work has been done, remove any mask and soften the edges with a damp brush, working outwards from the white centre or the light may be extinguished by flowing paint. Add other colours to the corona if you wish, but make sure the white survives. I used Pebeo drawing gum to mask the elements here. It’s trouble free and relatively long-lasting, but be careful, time and type of paper can affect the performance of any masking fluid. Being blue it’s more visible than some when laying it.
Step 2 - Underpainting

Once the mask is dry, lay the first washes, being careful to see through any preconceptions you might have about the true character of the colour and value schemes behind the subject item. Preparing the ground properly before removing the masking fluid can be a tricky business.
Step 3 - Build up layers

Once the underpainting is done in each area, remove the mask and begin to build subsequent layers. Here I began to define the butterfly’s wings with saturated colour around some of their boundaries. No need to overdo this; the eye and the brain are happy with a starter-for-ten.
Step 4 - Render form

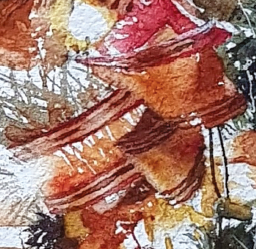
It’s important in any patterned item, whether it’s the ribbons here or your granny’s flowery teapot, to describe the form of the object in a (usually subtler) underpainting first before adding the pattern second, in richer washes. Look how I laid colour in the ribbons to describe form and curvature, before adding the striped patterns afterwards (Step 5), wet on dry, varying their intensity with the dash of a damp brush to correlate with the underpainting’s description.
Step 5 - Pattern

Here the stripes are added to complete the effect, mainly using alizarin, darkened or neutralised with burnt umber and a warm blue. The darkest greenery is Prussian blue and burnt umber, and I lightened adjacent bulbs with various earth colours.
Step 6 - Detail techniques

There’s a little too much white paper in evidence at this stage, undermining the golden glow I was after and concealing the output from the light bulbs. Warm red, warm yellow and earthcoloured washes would have cured this. In the lower half of the painting generally I avoided masking, instead building up marks on white paper to produce more improvised effects, while still being faithful to the reference photo. I used dry brush for the textures of the lowest bauble, bottom centre. The greenery of the garland often appears as several different hues, especially where light from adjacent bulbs plays on it. I rendered this in one operation, constantly changing pigments and running one into the next using my four earths, warm and cool yellow, and light and dark cool blues.
Step 7 - Final touches

The finished painting The Mantelpiece, watercolour on 200lb Whatman Rough paper, 13x8in. (33x20.5cm)
It’s important to register enough depth of tone in the darks if the painting is to succeed. Low pigment contents won’t render the atmosphere we all know of the lights after dark on Christmas night. This painting is a little too fastidious for some perhaps, including me, but an excellent vehicle to explain a myriad of processes. I added subtle glazes in several places to model volume and connect passages. White gouache was applied in several ways: with a Round No. 12; a Rigger; or by spattering. I used a ⅝in. flat brush for the fireplace darks, which were so rich in pigment they need bullying around, and a white gel pen for the finest lights, such as Santa’s wispy beard.


Comments
Login or register to add a comment
No comments