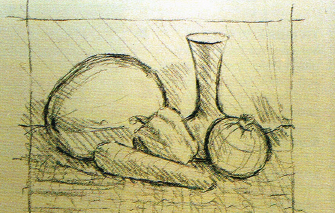
Figure 1
Step 1: If you are a beginner do not be over-ambitious when selecting subject matter. Build up your confidence and skills by tackling subjects with which you can cope. For this exercise I have chosen items with simple shapes and different colours.
Arrange your subject as an interesting group, and away from direct sunlight to avoid changing light. Use a desk lamp to create highlights and shadows and illuminate colours. Hang a drape behind the group to eliminate unwanted background. Make a quick tonal thumbnail sketch to check how the composition translates into two dimensions.
Step 2: Sit about 5ft from the still life, facing your board, which, ideally, should be vertical. Do not obscure your view of the subject with the board, or lay it flat on a table as this will give you a distorted view of its surface. Make sure you can see the subject with a simple turn of your head. Use a larger sheet of paper than your planned picture size, so that you can work freely across the edge of your painting. I used half imperial (15” x 22”) for a picture size of about 11” x 14”.
Step 3: Choose a dark colour to make the initial drawing. I prefer holding a pastel pencil by its end, at arm’s length so that I am as far as possible from the board. This gives me the best overall view of what I am doing. Draw lines for the picture edges. Loosely sketch the main structure lines of the composition. From time to time squint hard at the subject to help see the main tone areas and indicate these on your paper with hatched and cross-hatched lines. At this point you are establishing the position of shapes and tonal values. Don’t worry about lines in the wrong place, they won’t hurt. Only lift out pastel if things get confusing; then take great care, and do not rub. Putty rubbers and soft rubbers will damage the paper surface if used too vigorously. This stage is a structural guide. Do not draw detail, as this comes later.

Figure 2
Step 1: Apply the first colours with open linear strokes. This is the exploratory stage. Note how I have used various reds and yellows to create the colour of the background drape rather than trying to use just one red. This will make the final impression much more vibrant. Keep all parts of the picture progressing at the same pace. I have made tentative indications of texture on the vegetables. In a few small areas I have used heavier applications of pastel to see how some tones and colours will balance. This, in effect, is the underpainting. I will not begin the final work until I have resolved all the problems and am satisfied with what I have done so far.

The finished pastel 10½” x 14”
Figure 3
Step 1: I now apply the final application of pastel with firmer strokes of varying thicknesses and intensity, but am careful to allow parts of previous applications to show through. I make vigorous, clearly defined strokes for the coarse surfaces, drag colour over colour for softer surfaces and draw sharply defined edges for shiny surfaces.
Step 2: To finish the picture I add deep shadows and highlights, accentuate some shape details and heighten some specific colour areas.
Step 3: With the aid of two L-shaped cards or strips of white paper I decide on the precise boundaries of my painting. Because I painted beyond the approximate edges of the picture I now have some flexibility with this. As you progress, changes you make from your original conception can often affect your decision regarding the positioning of the mount.


Comments
Login or register to add a comment
No comments