I started making charcoal as an experiment to see if it was as good as the stuff you can buy. What I found was that it is better, at least I think it is.
I discovered lots of tutorials on the web, but none seemed to explain what kind of woods to use or provide details as to thickness and cooking times. So I figured it out myself.
The process
- You will need sticks of wood between 1 and 2 cm in diameter.
- The wood can be green, which means it doesn’t have to be dried out and can be cut straight from the tree.
- Leave the bark on.
- Cut the sticks to the length of your tin.
- Pack the tin, using thicker pieces to the outer edge and thinner ones in the centre as this helps to get an even burn
- Cover the open end of the tin with the aluminium foil.
- Pierce a small hole in the foil.
- Place the tin on your heat source.
- Smoke will come from the hole once the process begins.
- Keep rotating the tin every so often to make sure all the wood is “cooked”
- It can take between 30 minutes and 2 hours to produce charcoal, depending on your heat source.
- Your charcoal is done when there is no more smoke coming from the hole.
- Once you take the tin off the heat, allow it to cool down naturally or your charcoal might crack.
- If you take the foil off and find it’s not done you can put it back on the heat.
Not every stick you put in the tin will work. You may find some too brittle or underdone. I have a 50% success rate which normally gives me about eight sticks per batch.

Close up of a finished stick
Test examples of different woods tried


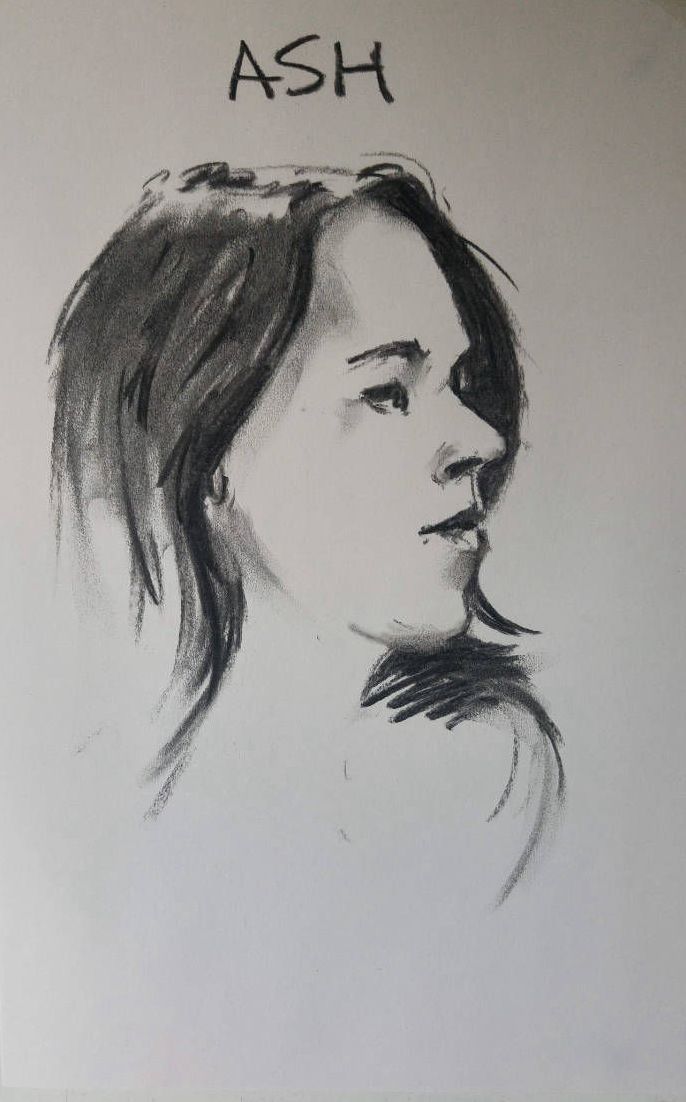
Following all of my experiments, I now only make charcoal using hawthorn. It can be sharpened like a pencil and is soft enough to make a dense black, and one good piece can make three drawings. I use the same piece for all parts of the drawing (see the example below).

This portrait was created using one piece of hawthorn charcoal from start to finish, a homemade "smudger" and the vital "putty" rubber. (I make my smudgers out of old egg boxes- see below).

Making smudgers
Most of the time I use my fingers to smudge and blend the charcoal. However, there are times when it's a little difficult, like on an eyelid or above the lip. That's where the smudger comes in.
Rather than buy smudgers I decided I'd have a go at making some. I tried all sorts of things, from rolled up paper to the pith from dead elder branches.
Then I found some empty egg trays lying around outside which were a little damp. I started thinking that, as they are made from paper, maybe I could turn them back into pulp and shape them into smudgers.
So I soaked the egg boxes in water overnight, until they became smooth pulp. I then took a handful and squeezed it in my hand. It made a pellet-like shape and I could easily make then ends into a point. I did try to make them more pencil like, but they didn't hold together.

I find they work great and tend to soften a little as you use them, which helps to make more delicate blends, without being too brush like.
I made a dozen from one box and I'm still using my first one so I suspect they will last me a while.
See more from Tony on his website, tonyswaby.com, or on Instagram by clicking here.


Comments
Login or register to add a comment
No comments