


Oil paint is a versatile medium that suits both amateur and professional painters. It can be applied in many ways – thin, glazed, impasto, drybrush – and the vast array of tools and materials is so extensive that it can get rather confusing.
Avoid the confusion and discover all you need to know with our guide to oil painting.
- What oil paints should I use?
- Which colours do I need?
- What are oil painting mediums, and how do I use them?
- What should I paint on?
- What is a ground?
- What do I use to apply oil paint?
- Will I need an easel?
- How do I use a paint palette?
- Should I varnish an oil painting?
Which paints should I use? Oil paints explained
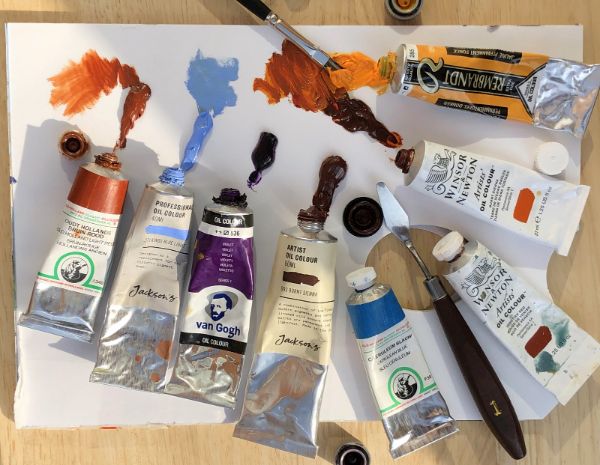
Student versus artist quality
‘If you’re a relative newcomer to oil painting, it isn’t necessary to buy expensive artist-quality oils, student-quality oils are more than adequate,’ says Alan Bickley. ‘Although the variety of colours may be more limited, that’s not a bad thing as it’s important to learn the benefits of colour mixing’.
Student-quality oils are often made from manufactured colours. They are very useable and much cheaper so, for beginners they are the prudent choice. Student-quality oil paints contain thinning agents and far less pigment.
Alan recommends the following:
- Winsor & Newton Winton oil colours
- Daler-Rowney Georgian range
- Jackson’s Artist Oil paints, which give great coverage with a free-flowing consistency
Artist-quality oils contain expensive pigments, are more lightfast, pure and vibrant, and have far greater tinting power. Once you’ve become more confident with oil painting, you may want to experiment with the more expensive artist-quality oils. Alan recommends the following:
- Michael Harding
- Winsor & Newton
- Old Holland
- Royal Talens Rembrandt
- Jackson’s Professional range
Which colours do I need? A guide to oil paint colours
Your oil colour palette explained
‘Where to begin?’ asks Christine Pybus. ‘First, whatever colours you may already have will be just fine. That said, if you have a tube of black, hide it, as it’s only to be used very sparingly. Mixing black with anything is likely to create a muddy grey.
‘If in time you decide that you want to specialise in flower, portrait or landscape painting you’ll need a completely individual range of colours. The following is simply a guide for beginners’.
- Titanium white - A good stable bright white, which will stay white for posterity
- Cerulean or cobalt blue - Although these are slightly different colours, they are both good for skies, seas and for mixing greens
- French ultramarine blue - Essential for mixing darks and, added to burnt sienna, it makes a fresh and lively alternative to black
- Burnt sienna - A rich autumnal brown, for use in autumn foliage, cliffs and for mixing darks
- Raw sienna - A lovely yellow-brown colour for mixing grasses and greens. It’s also useful in marine painting
- Yellow ochre (Daler-Rowney’s yellow ochre, or other manufacturer yellow ochre light) - When mixed with white, yellow ochre is good for creamy clouds or sunny beaches. Some yellow ochres are essentially browns so choose carefully if buying a tube
- Naples yellow 1 (or light) - This is a rich creamy colour, which is perfect for winter grasses and highlights, and is a good alternative to white for lightening other colours where softness is required
- Lemon yellow (hue) - A modern replacement for lemon yellow due to the latter’s toxicity. It is used almost neat from the tube to paint sunny grass highlights. It’s a great mixer, which will produce a wide range of greens
- Light red - If mixed with ultramarine blue and Naples yellow it will produce an infinite number of warm, cool, dark or light greys

Autumn at Ewe Cote, oil on board, (20x25cm) by Christine Pybus
The sky greys are a mixture of light red, ultramarine blue and Naples yellow. I used titanium white and yellow ochre for the clouds, and cerulean blue lightened with white for the blue areas. Burnt sienna was used for the treesand the grass was mixed from lemon yellow with just hints of cerulean blue and white.
The importance of white
In oil painting it’s the white that creates the luminosity and sparkle in a picture so it’s worth eventually investing in a good tube.
Christine recommends the following:
- Roberson
- Mike Harding
- Other hand-ground whites
Should I thin my oil paints? Mediums for oil painting explained

Oil paints can, of course, be used straight from the tube. However a variety of mediums can be used to adapt the consistency, drying time and finish of your painting.
‘There are many good mediums you could experiment with,’ says Alan. ‘It’s worth mentioning here that oil paint already contains oil (usually linseed) as its binding agent, so if you do add oil, use it in moderation, although that may depend to some extent on your style of painting. Edward Wesson used just neat turps, keeping it simple!'
Oil painting mediums:
- Refined linseed oil is the most commonly used medium but on its own it is extremely slow drying. Try mixing it with distilled turpentine at a ratio of 40/60 (you can experiment with this ratio).
- Stand oil is also excellent; it is a thick, syrupy oil that also has good glazing properties. Again, this is better thinned with turpentine. If you dislike the smell of turpentine, low-odour solvents – such as Sansodor – are an alternative, but you will still need to work in a ventilated room as they are still hazardous.
- Cold wax is a useful, versatile medium made with a base of beeswax. It will add more body and texture as well as help to speed up drying time. Alan uses Gamblin, which can also be used as a matt varnish on the finished painting. Winsor & Newton and Zest-It cold wax are possible alternatives.
- Colourless painting gel mediums can have their uses. Pebeo Painting Medium Gel is one that I’ve used but there are many others. Mix with oil paint to make the paint more fluid without thinning it down, thus improving flow and transparency; it also helps to speed up drying time.
What do I paint on? Oil painting supports explained
Supports fall into two categories, flexible and rigid.
Flexible supports include canvas, linen, hessian, flax, calico, card or even paper.
‘Canvases are a treat to paint on, and are mainly manufactured in rough, medium or fine,' says Christine.
- Rough is most suited to those who use thick paint, perhaps applied with a painting knife
- Medium is a good all-round canvas
- Fine, often linen, is for those who prefer to paint detail
In addition, there are 3cm to 4cm thick box canvases for those who prefer not to frame their work and normal canvases, approximately 2cm, for those who do.
Oil pads are a flexible canvas-textured material bonded in layers onto a board. The layers can be removed using a knife when the painting is dry, leaving a new surface ready for the next picture. They are cheap and fine for practising on, but the finished picture will need either to be bonded to a board or framed like a watercolour, should you wish to preserve it for posterity.
Top Tip
There are negatives to using canvas. It is easily damaged and is more expensive than board – and, of course, you have to fill the canvas to the edges hence the canvas size composes your picture.
Rigid supports include hardboard, MDF, wood panels (hardwood) and the popular canvas-covered boards, in which the canvas is glued to compressed cardboard or MDF, which is even more sturdy. Royal Talens and Jackson’s sell a range of canvas and linen panels that are bonded to MDF and are among Alan’s favourites.
Top tip
It’s often more economic to buy a large board and cut it into smaller pieces.
How do I prepare my surface for oil painting? Grounds explained
‘All supports will need some form of primer or ground adding before you can start applying paint,’ says Alan. ‘Most stretched canvases, canvas boards and pads will probably come ready primed, but you may want to give these another coat of acrylic gesso, although this shouldn’t be necessary with quality branded products’.
Christine adds, ‘Using a pure white canvas will give a soft quality to your painting, whilst adding a wash to your board before painting, and leaving it to dry, has the same effect as turning up the contrast on your computer or television screen. A strong ground tone will produce a high-contrast picture and a mid-tone a more balanced work’.
Alan generally applies three coats of acrylic gesso to his supports and recommends using warm or cool greys and ochres for grounds., whereas Christine opts for a rough wash of acrylic burnt sienna, thinned with water and left to dry.
Read more on preparing MDF boards for oil painting from Dawn Jordan.
Top tip
Gesso can be applied as thinly or thickly as you want, and it does create a satisfactory and economical rigid surface to paint on.
It’s much easier to judge and adjust your tonal values and colours when working on a neutral ground, as Alan illustrates with the snow scene below.

Snow: burnt sienna ground

Snow: grey ground
Here you can see the advantages of a coloured ground – darker and lighter tones are more noticeable – you wouldn’t see these so well on a white ground.
Follow a step-by-step demonstration to paint a snow scene on a mid-toned ground with Alan. Or be inspired by ideas from Christine.
Top tip
Allowing, portions of your background colour to show through in the finished piece gives some degree of cohesion or harmony to the finished work.
How do I apply oil paint? Brushes and palette knives explained
Brushes

‘Brushes are such an important item for artists that you can’t afford to skimp on quality,’ says Alan.
Alan’s recommendations:
- Rosemary & Co – they have a huge selection of superbly hand-crafted brushes to suit every need.
- Jackson’s Black Hog and Shiro Hog brushes which are both hard wearing and economical.
READ MAX HALE'S REPORT ON JACKSON'S BLACK HOG BRUSHES
Types of brush:
- Flats (also known as a ‘bright’s) - good all-round brushes that leave lovely crisp, exciting brushmarks. Christine favours a long flat, which is less precise, making freer, looser marks and has something of a mind of its own.
- Oval-ended filbert – for creating softer edges.
- Rounds – for more precise work and adding detail.
- Rigger - a long, thin watercolour-type brush, originally used for painting ships’ rigging. It’s helpful for painting tree branches, masts or anything that needs either a straight or a long line.
Top tip
Long handles are a better option. They allow more freedom of movement and indeed keep your hands out of the paint. You can, of course, always cut them down if required.
Brush sizes
‘To get started you will need bristle, a blend of bristle and synthetic, or synthetic brushes, in perhaps three different sizes,’ says Christine. ‘Nos. 2, 4 and 6, or a similar size will do. They are often very close in size so allow gaps in between. Next, choose a No. 3 or 4 watercolour-type synthetic Round pointed brush, but don’t buy the best sable ones, as they won’t last. Finally, look for a No. 2 or 3 Rigger.’
Top tip
You will need to clean your brushes very regularly; dirty or saturated cloths simply don’t work and will result in muddy paintings. Large and absorbent cloths are an essential part of your painting kit. Aim for at least a floor cloth size or larger.
Painting/palette knives explained
Painting knives allow for expressive impasto-style work and although the paint doesn’t have to be thickly applied, it often is.
There’s a whole range of shapes and sizes available and they’re great to experiment with.
Flat palette knives are more suited to initial mixing of colours on the palette and are useful when mixing up larger quantities of paint.
Daryl Urig's top techniques for knife painting
How to hold a palette knife

It is best to have a light touch. Hold the painting knife loosely between your fingertips and allow it to be a flexible extension of your arm and hand.
Painting with a knife is like icing a cake. If you push too hard on the cake, you’ll find crumbs in your icing. Gently layer paint on top of existing paint or the panel. Sometimes you may want to push down through the layers, but don’t do this so hard that you dent the paint and scrape down to the primer of the panel. And be careful that you’re not treating the knife like a bulldozer, scraping up all the paint you laid down previously. A soft attitude is needed.
The correct consistency for your paint

Your paint needs to be whippy, similar to the consistency of mayonnaise. If it isn’t, add a little walnut oil to achieve the desired feel.
The edge of the knife

The edge of the knife is for painting sharp thin lines: the more paint, the thicker the line, the less paint, the thinner the line. Generally, if you cannot persuade the paint to come off the edge of the knife, you will need to add more walnut oil until it does. Lines generally need more walnut oil.
How to pick up the paint

Use the bottom side of the knife to hold the paint. Swipe it up from the palette on either the right, left, tip or edge of the knife. Place the paint on the portion of the knife you want to pull the paint from.
How to clean your knife
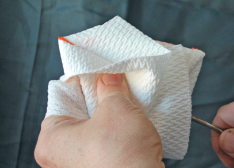
Cleaning your painting knife is simple with a paper towel. Use the same towel as long as you can, until it is too full of discarded paint. Then dispose of your towels in a lidded metal tin, which should have some water in it. M. Graham oil paints are made with vegetable oil and are safe to carry on aircraft.
Mark making with a palette knife
Here is quick start to a few basic marks you can paint with the knife:

Using the tip of the knife, load the paint to the underneath side and tip of the knife then pull straight down with even pressure.

Using the side of the knife and with thin, but not too runny paint, tilt the knife on to its right side to deliver the paint.

Using the right face of the knife, load paint on the underneath right side of the knife and pull down.
Find out more about Daryl on his website at www.darylurig.com
Do I need an easel? Easels explained
Working flat isn’t a viable option for oil painting so an easel will be necessary. Options include a table easel, a box easel, which is a full-size floor standing easel that, as its name suggests, folds down into a box, or a larger floor-standing studio easel.
Easels for the studio
For studio work, Alan recommends an H-frame easel, so-named as they are shaped like a letter H, which are solid and will hold a large canvas steady.
Radial easels are a popular alternative. These are made from a tripod of short legs which support an upper section hinged just above the three legs allowing the artist to tilt it to adjust their working angle.
Top tip
Make sure you buy a good-quality branded easel, which will be constructed from beech; a cheap easel may warp – not what you want!
Easels for painting en plein air
For plein-air painting there are many well-designed easels available, such as a French easel which contain a sketchbox for holding art supplies, although they can be a little heavy when full of materials.
Pochade box
Alan’s preference for painting outdoors is to use a pochade box, which is small and compact enough to carry around, which he mounts on a good sturdy tripod the Manfrotto MT190 tripod is a great choice.
Christine also recommends a pochade box saying, ‘These come in a multitude of shapes, sizes and types, which are a versatile option as they can be used on your knee outside or on a table inside.
‘Pochade boxes carry all you need to paint, brushes, paints, palette, a board and a small bottle of solvent so are essentially a self-contained studio.’
Do I need a palette? Painting palettes explained

‘There are some great designs available nowadays, including the traditionally shaped palettes that we are perhaps more familiar with, New Wave also have a selection of ergonomically designed styles to choose from,’ says Alan.
Types of palette:
- Wood - Traditional wooden palettes are nice to use, although you must be aware that when new they are very absorbent. They benefit from either using for a while or rubbing with a little linseed oil beforehand to bed them in.
- Glass
- Melamine
- Disposable - If you are an occasional painter and want to clean your palette after use, a plastic palette or tear-off disposable one might be easier
How to hold a palette
Should you put your thumb through the hole in the palette to hold it, leave it in the box or on the easel to work? The answer is simple; do whatever is most comfortable for you!
Laying out colours on your palette
‘Laying the colours out on your palette is again down to personal preference; you’ll soon become used to where they are and will likely never move them again,’ says Christine.
A rough guide:
- Keep the warm colours (reds and browns) together and likewise the cools (blues and greens).
- Bear in mind that you will use a lot of white so allow plenty of space for it and place it in a readily accessible place: on the right for right-handed people and on the left for those who are left-handed.
- The colours are best placed towards the outside edge of the palette, allowing space in the centre to drag them in for mixing.
- A single clip-on dipper is needed to hold the solvent for brush cleaning.
Should I varnish my finished painting? Varnishing explained
You don’t have to varnish your finished masterpiece, many artists don’t, so why do it?
- Varnish will protect the surface of the paint, making cleaning with a damp cloth, etc, really simple
- A coat of varnish can give the painting a more uniform sheen and appearance, a vibrancy and richness that was otherwise lacking
- Whether you select from matt, satin or gloss is a matter of taste, however, using matt avoids a distracting glare when paintings are hung
- Varnish is available in bottles to be brushed on, and aerosol cans
- If you do choose to varnish your paintings, you must wait a minimum of 6 to 12 months to allow the paint to dry
- Gamblin cold wax can also be used as a protective coat; apply it with a lint-free cloth or brush, then buff the surface to the required sheen
Alan’s top tip
Always buy the best materials that you can afford, opt for the well-known branded makes. Brushes, in particular, must be good quality, a set of inadequate brushes will prove to be a huge handicap. Oil painting may look easy in the hands of a professional yet it’s anything but – you do need good materials to work with.
Alan studied fine art and graphic design at Stafford College of Art and spent many years as a designer and editorial artist in the newspaper industry. He has won many awards in our TALP Open painting competitions. Alan’s more recent work can be seen in our online gallery.
Alan is a regular contributor to The Artist and our e-newsletters.
Christine’s top tip
Oil paint is unforgiving on clothes hence remaining a fashion icon whilst painting is difficult, and worrying about your clothes is not conducive to concentrating on your work. Wear old clothes that can then be recycled into paint cloths at a later date.
Christine is a regular contributor to Leisure Painter.
Find out more about Christine, her work and workshops by visiting www.pybusfinearts.co.uk
Ready to go further? Develop your oil painting skills with part two of our guide to painting with oils.
Follow some great step-by-step oil painting demonstrations from Alan and see our associated articles and videos below.
Would you like to frame your own oil paintings? Get framing here!
*Please note that this article contains some affiliate links.

")
")


Comments
Login or register to add a comment
No comments